
Travel Kit
how I pack for making art on the road
10.20.2017
I love traveling almost as much as I love the rhythm and flow of my studio. I used to think that they were mutually exclusive pass times. But over the years I’ve found some ways to combine the two that really work for me, and I thought I’d share some of my tactics.

PLAN / where are you headed?
The first thing I ask when I’m packing for a trip is: what’s available in or near my destination? I reach out to friends who have traveled the area to find a local contact who can help answer some supply accessibility questions. Will you be within a 2 hour drive of a city that has some type of an art store? Maybe you’ll only have access a hardware store, or be limited what's naturally occurring in the region.

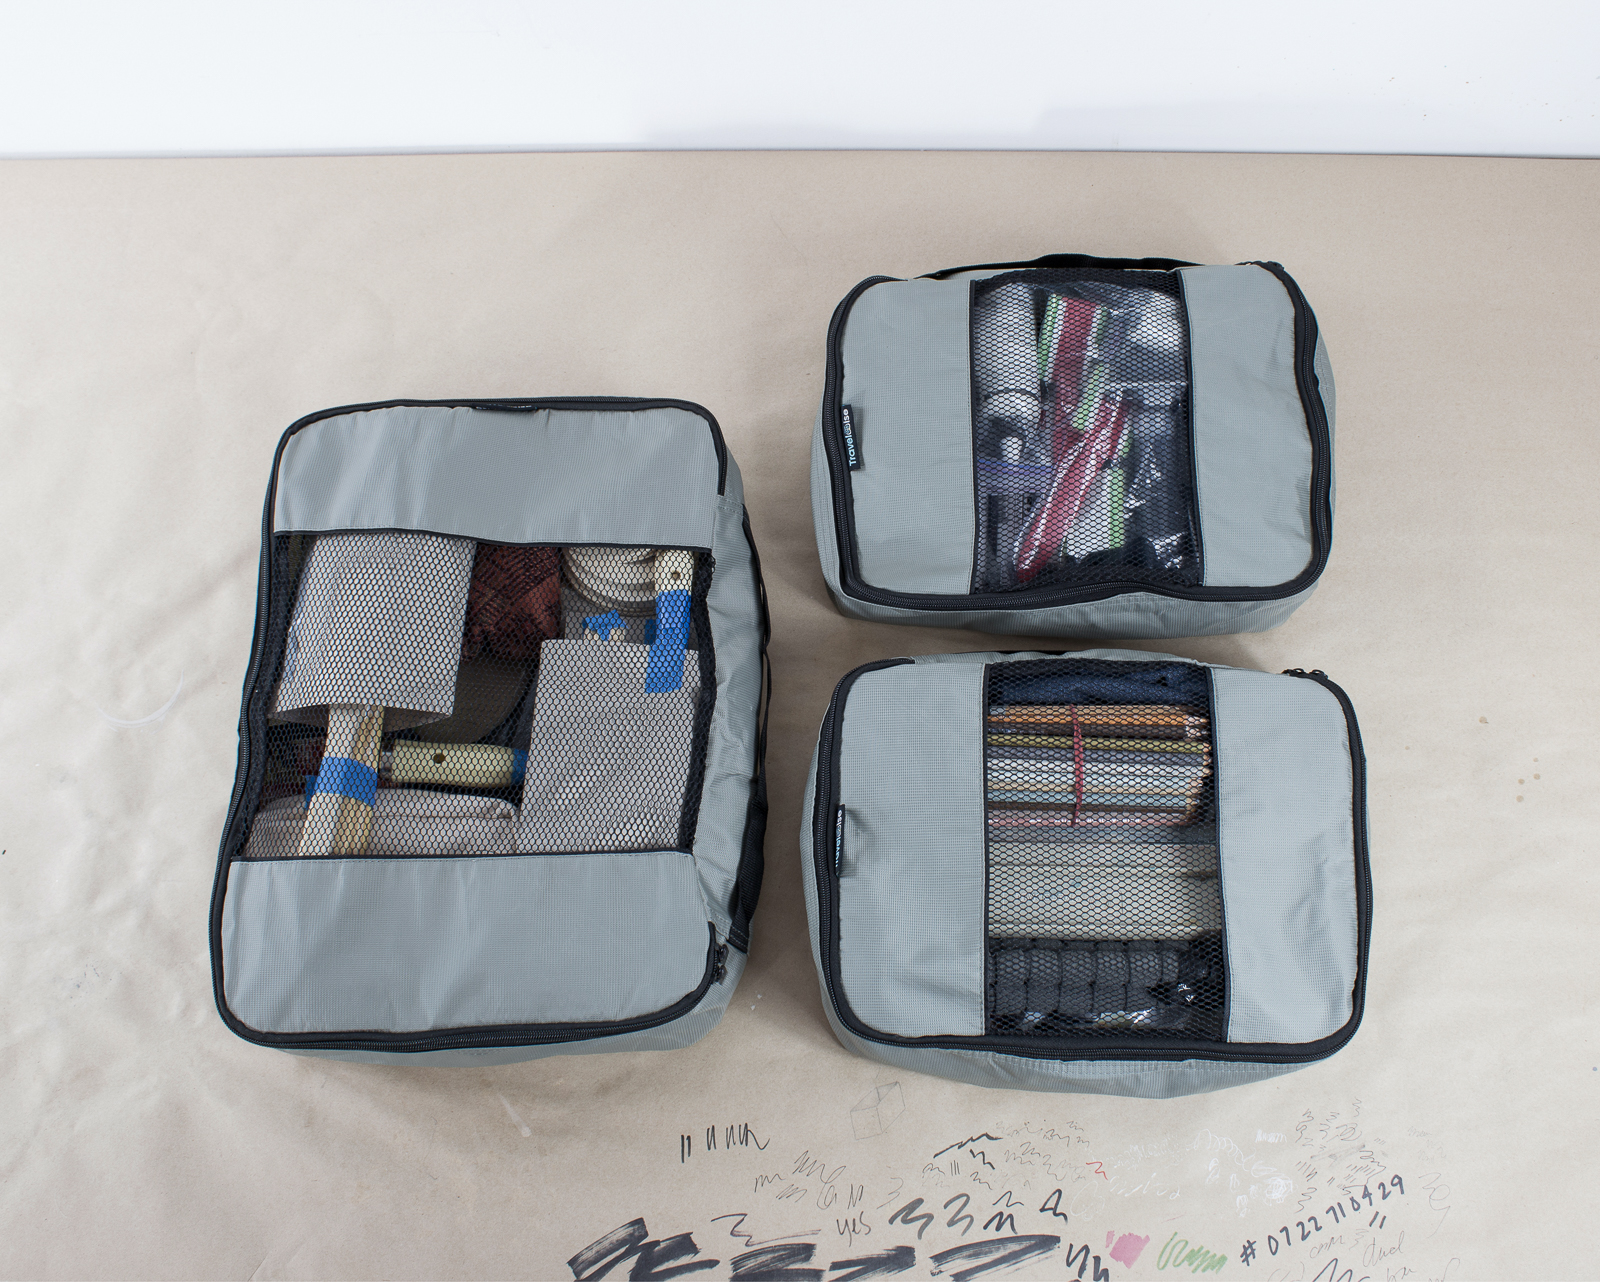
I use a brush roll to organize and protect my small brushes. For larger brushes that don't fit in the roll, I fold and tape card stock to make an envelope that protects the bristles from bending.
TOOLS / WHAT TO BRING
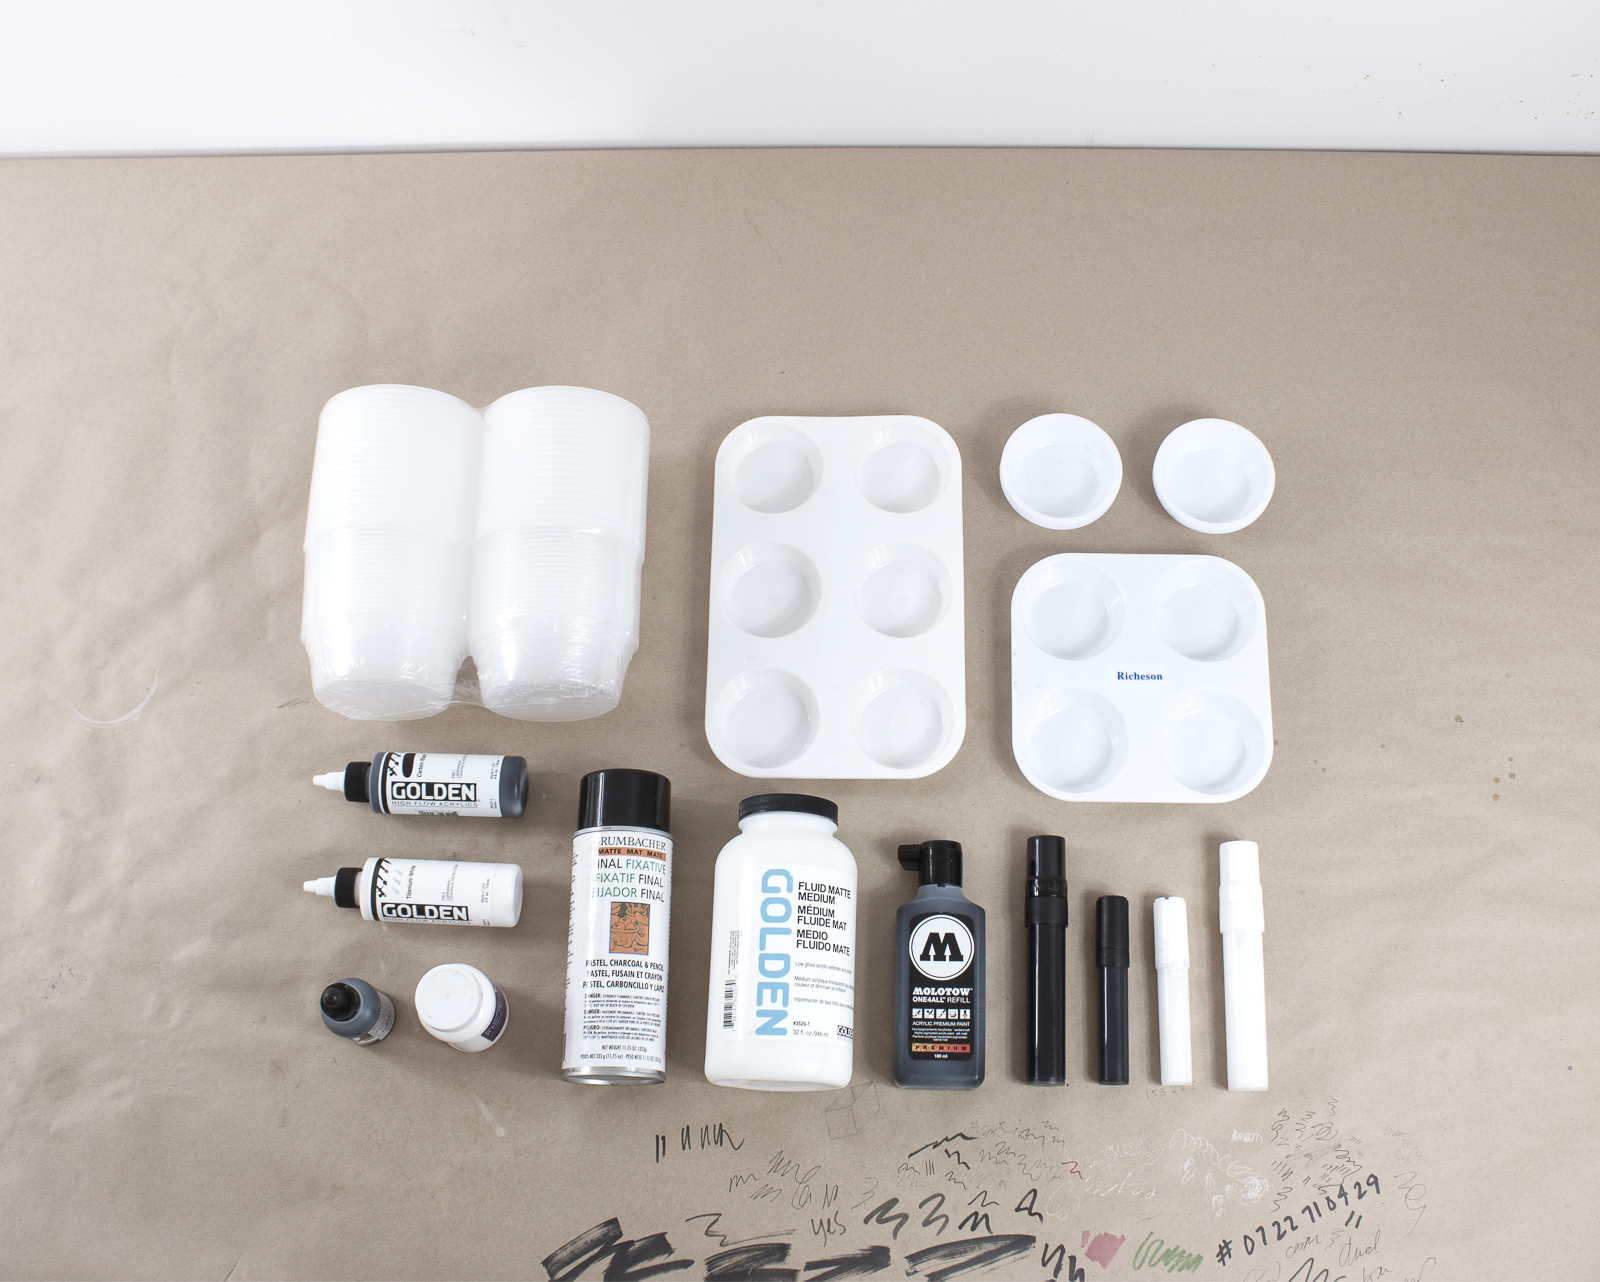
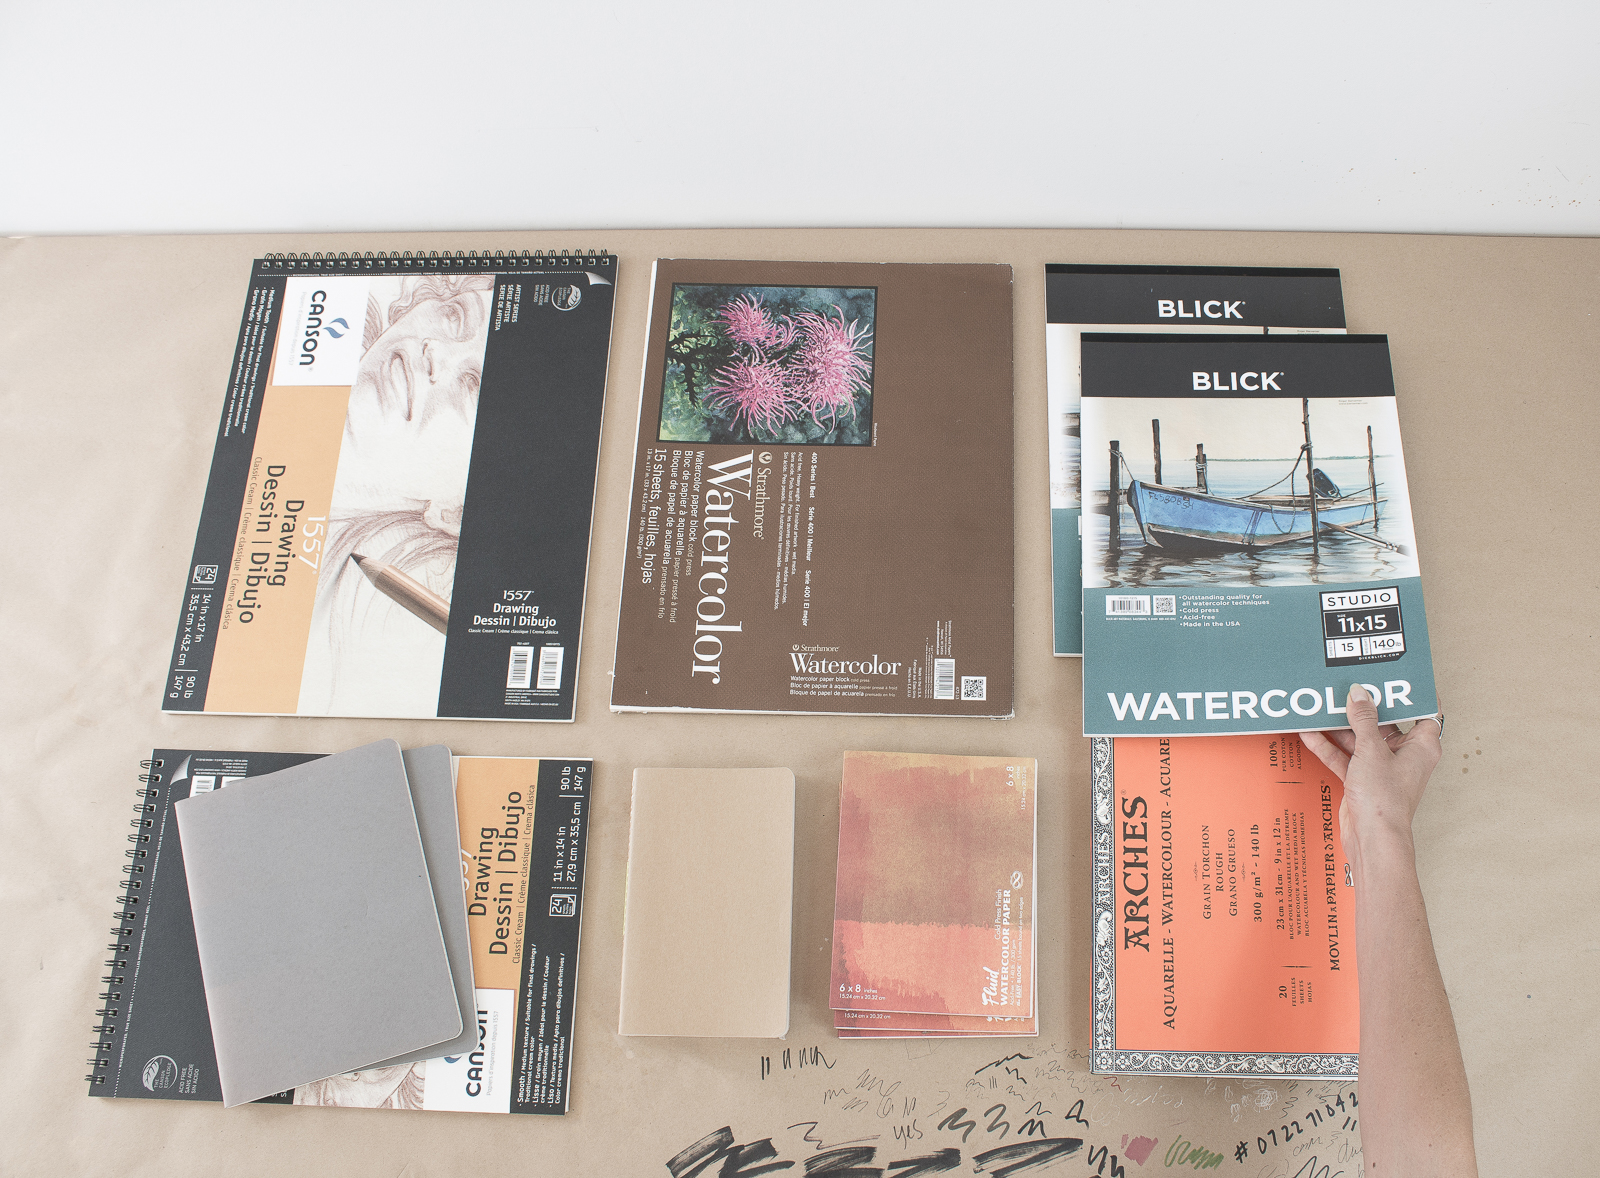
There are some things that I never pack that are often easy to source locally, like buckets or latex paint for murals. However, I bring in everything else that I need so I am certain that I’ll be prepared. That said, I try to minimize my kit as much as possible because no matter what, the bag gets heavy. I like to set aside everything I think I want to bring, and go through it 2 or 3 more times, removing anything I can live without. Small and lightweight supplies (like ink and watercolor) are great on the road. It’s smart to seal up any pigments in double-reinforced ziplock bags to avoid a high pressure catastrophe. As for surface materials, I am a big fan of paper and raw canvas.
Transportation / how to keep it safe
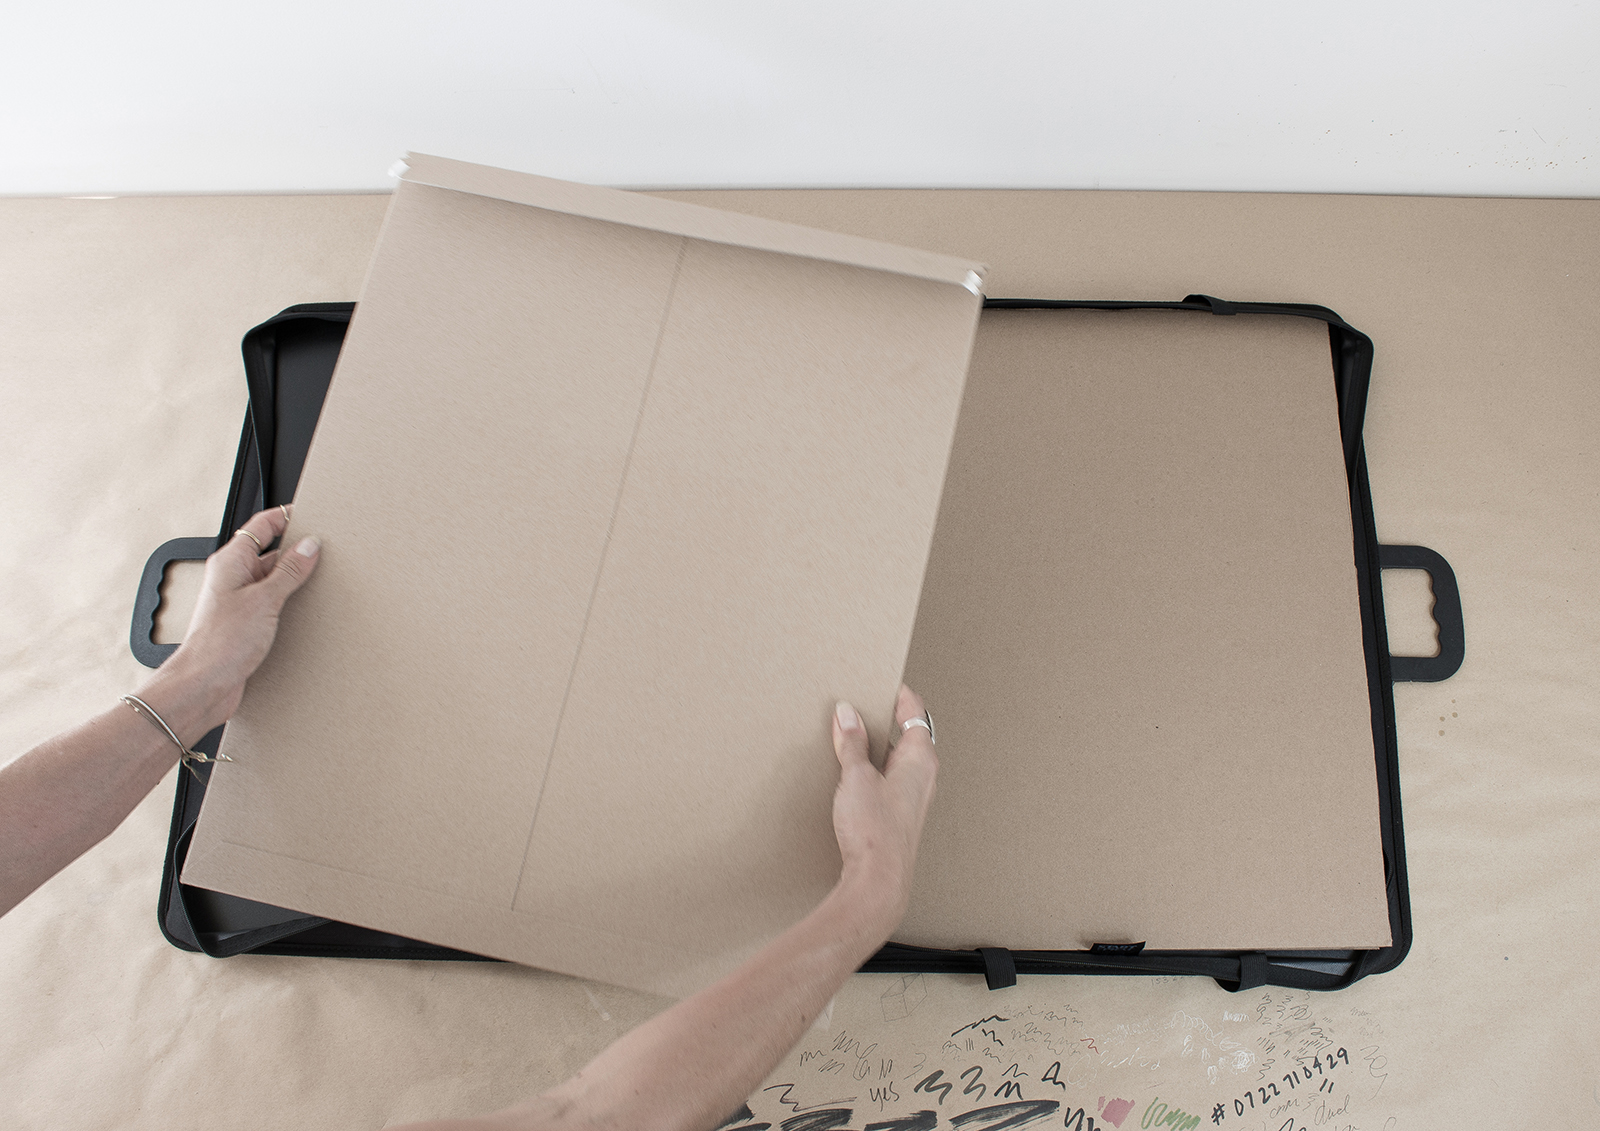
Paper is easy to transport at small sizes - but it’s important to think about how you’re going to keep your completed works safe after they have been separated from your sketchbook, roll or block of paper. I travel with a rigid portfolio with handles that fits inside my checked bag. If I’m traveling light I’ll bring something small enough to fit inside my carry-on like a sturdy mailing envelope lined with cardboard, or an accordion binder from an office supply store.
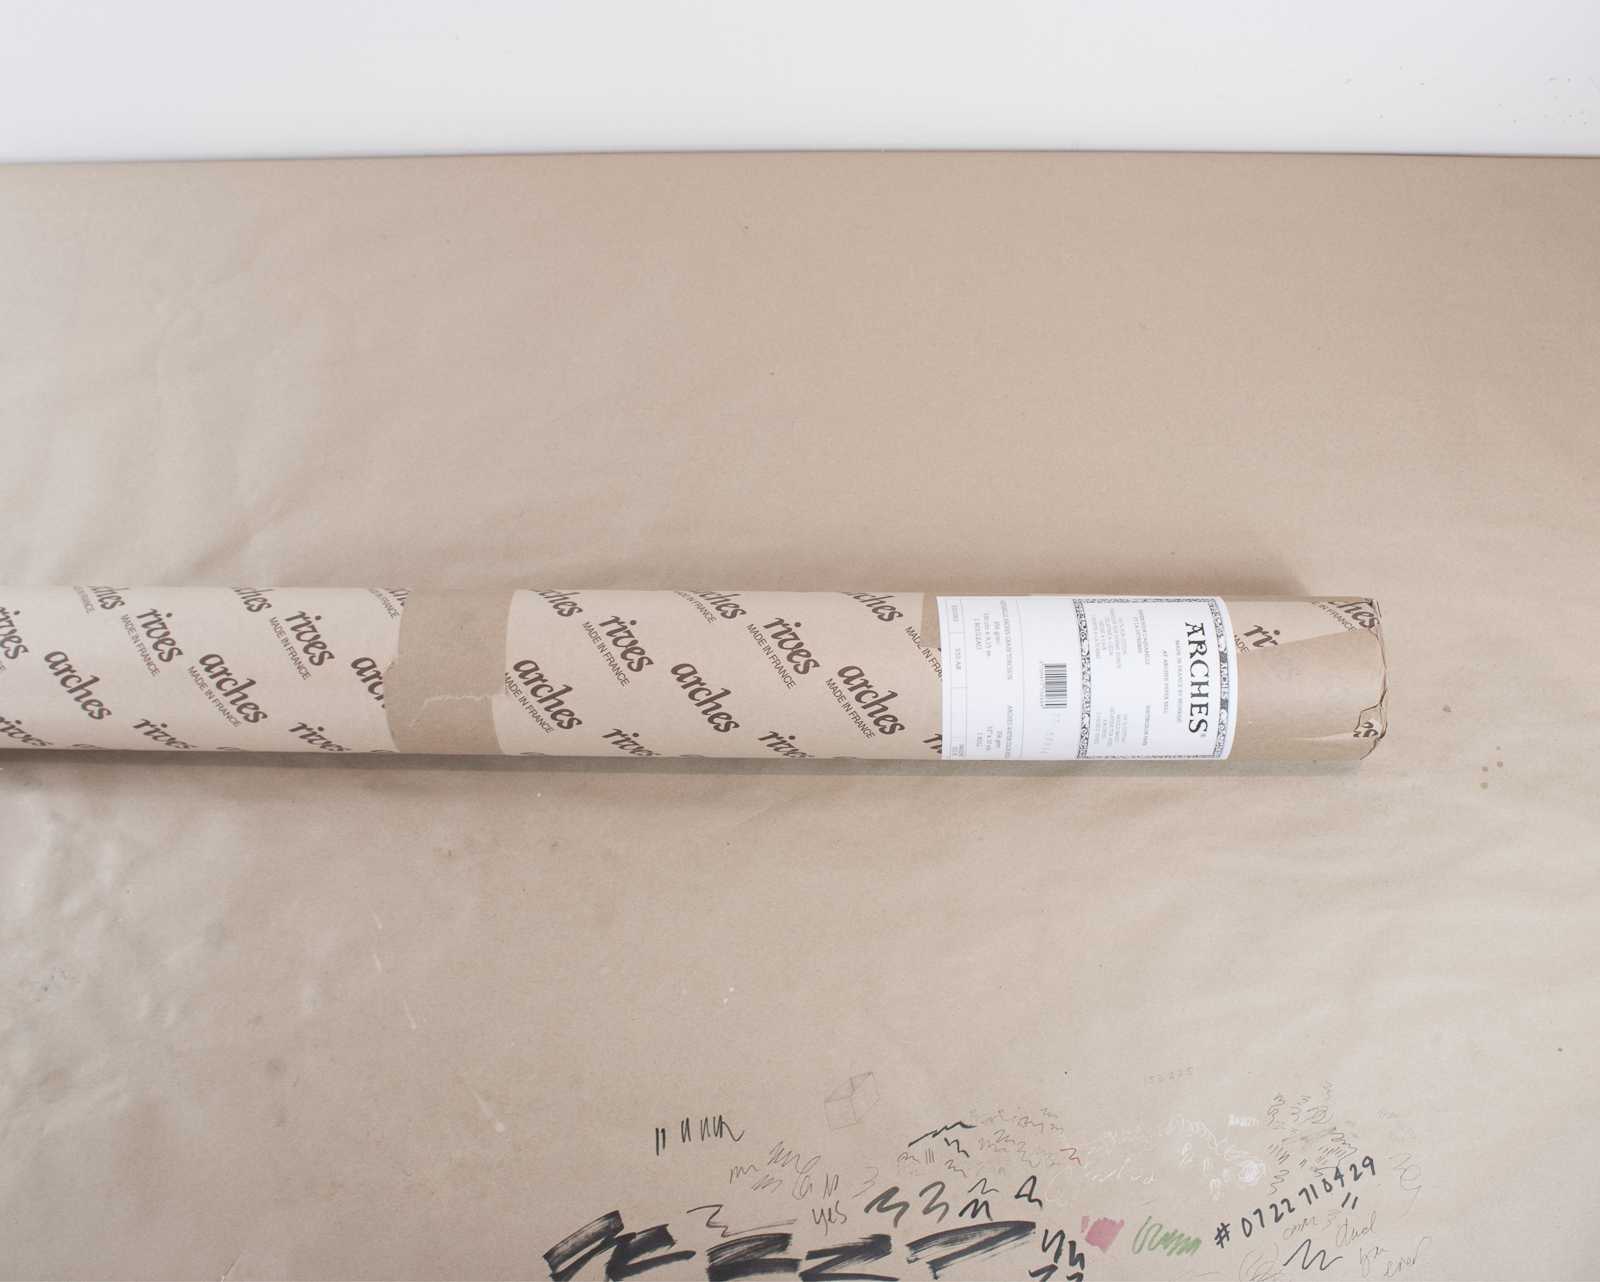
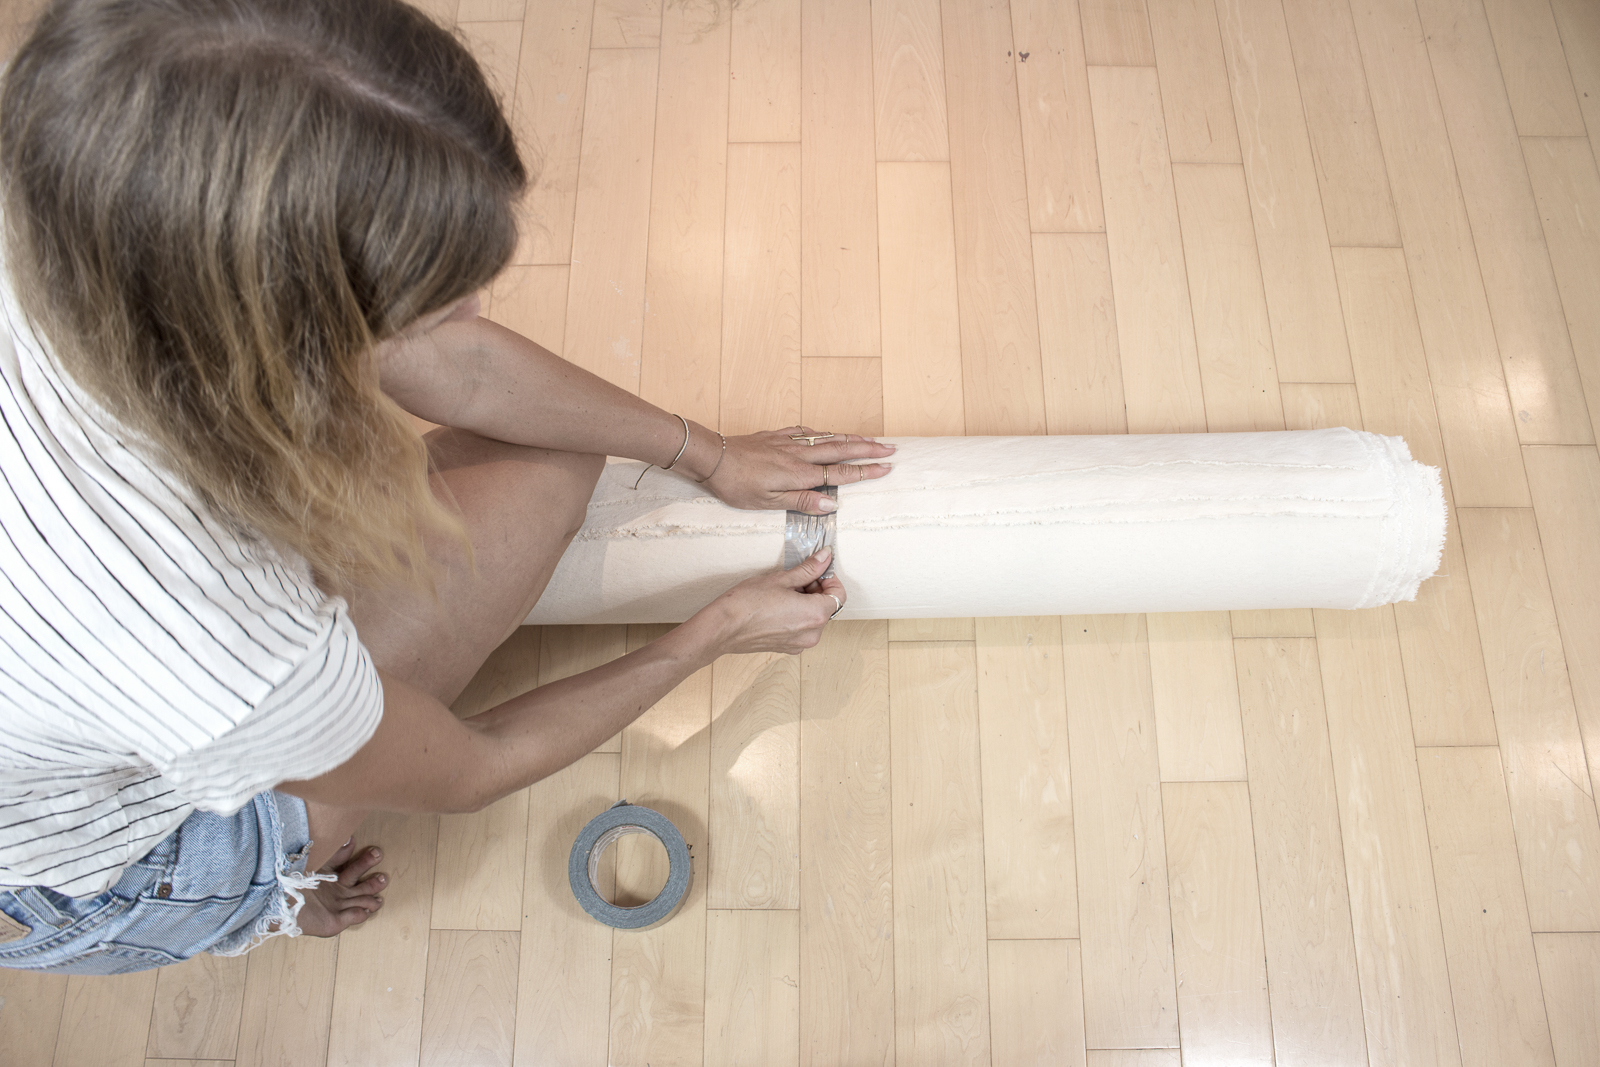
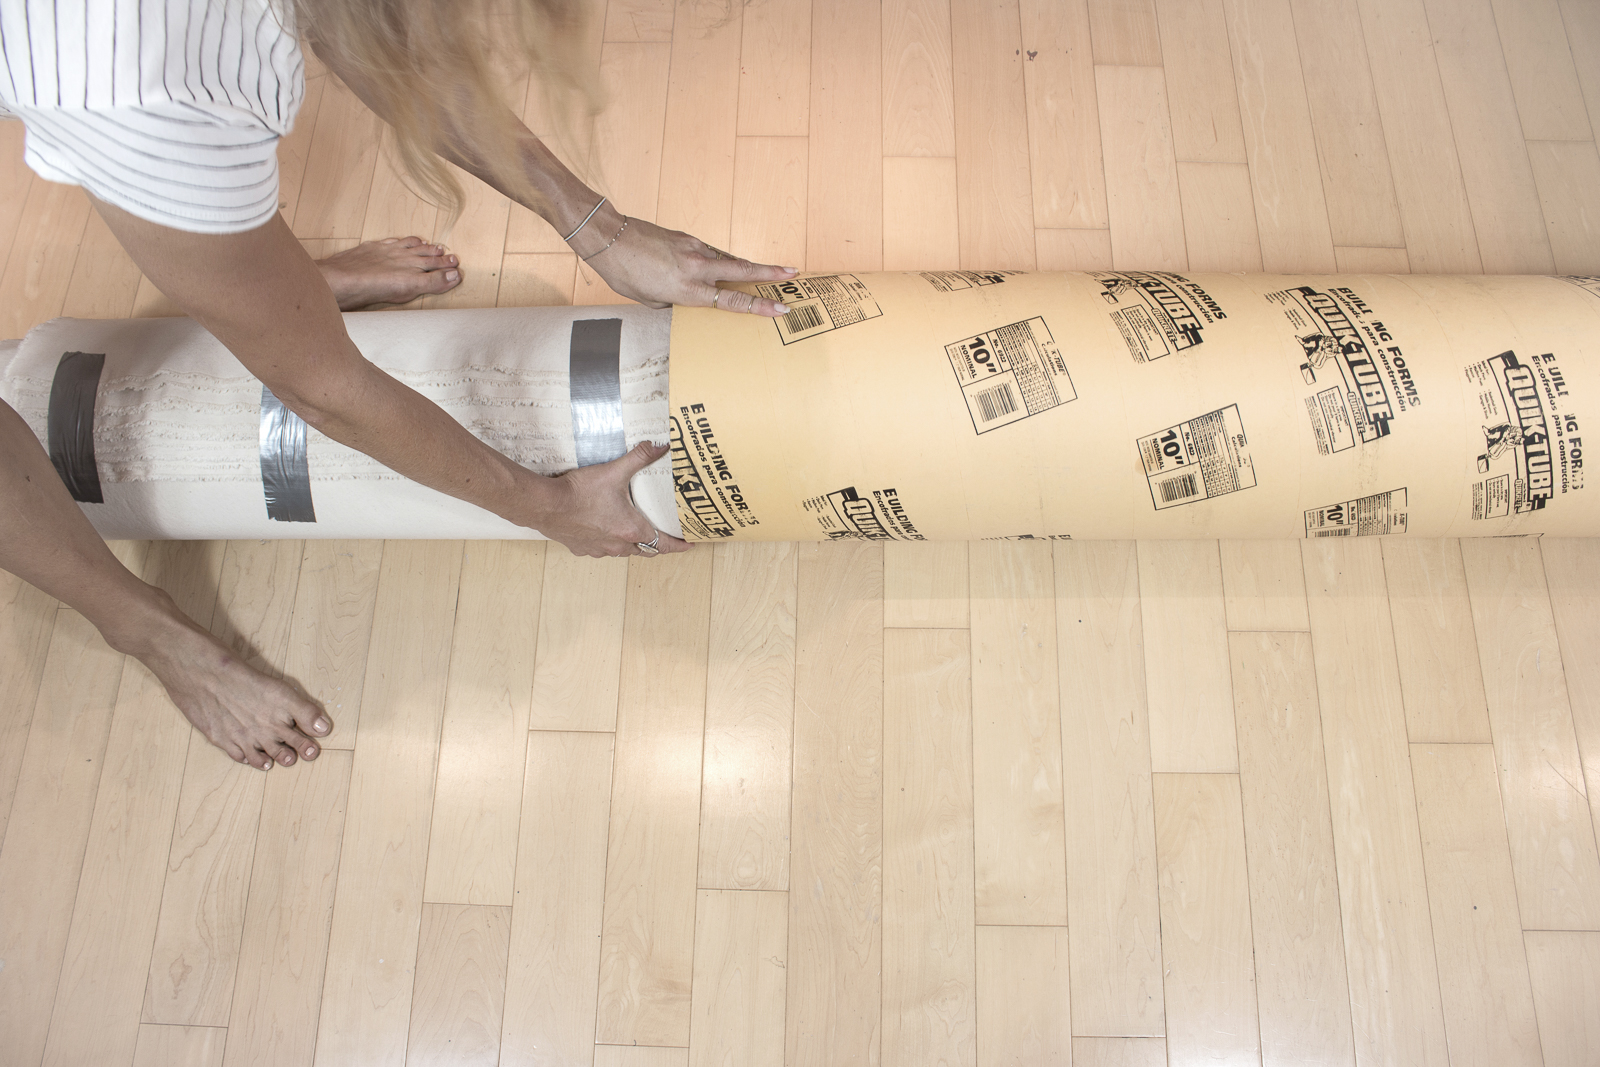
For longer trips, I like to recreate as much of my home studio as possible - and for me, that means working larger. A 10 yard roll of Arches paper is my favorite for large pieces, and can easily be torn down for smaller works. For this trip, I packed 2 rolls of Arches. The first one I left wrapped tight in it's original packaging, the second I opened and allowed to expand just enough to fit snuggly around the unopened roll. That process is a bit of a tricky dance, but it takes up far less space than packing two unopened rolls side by side.
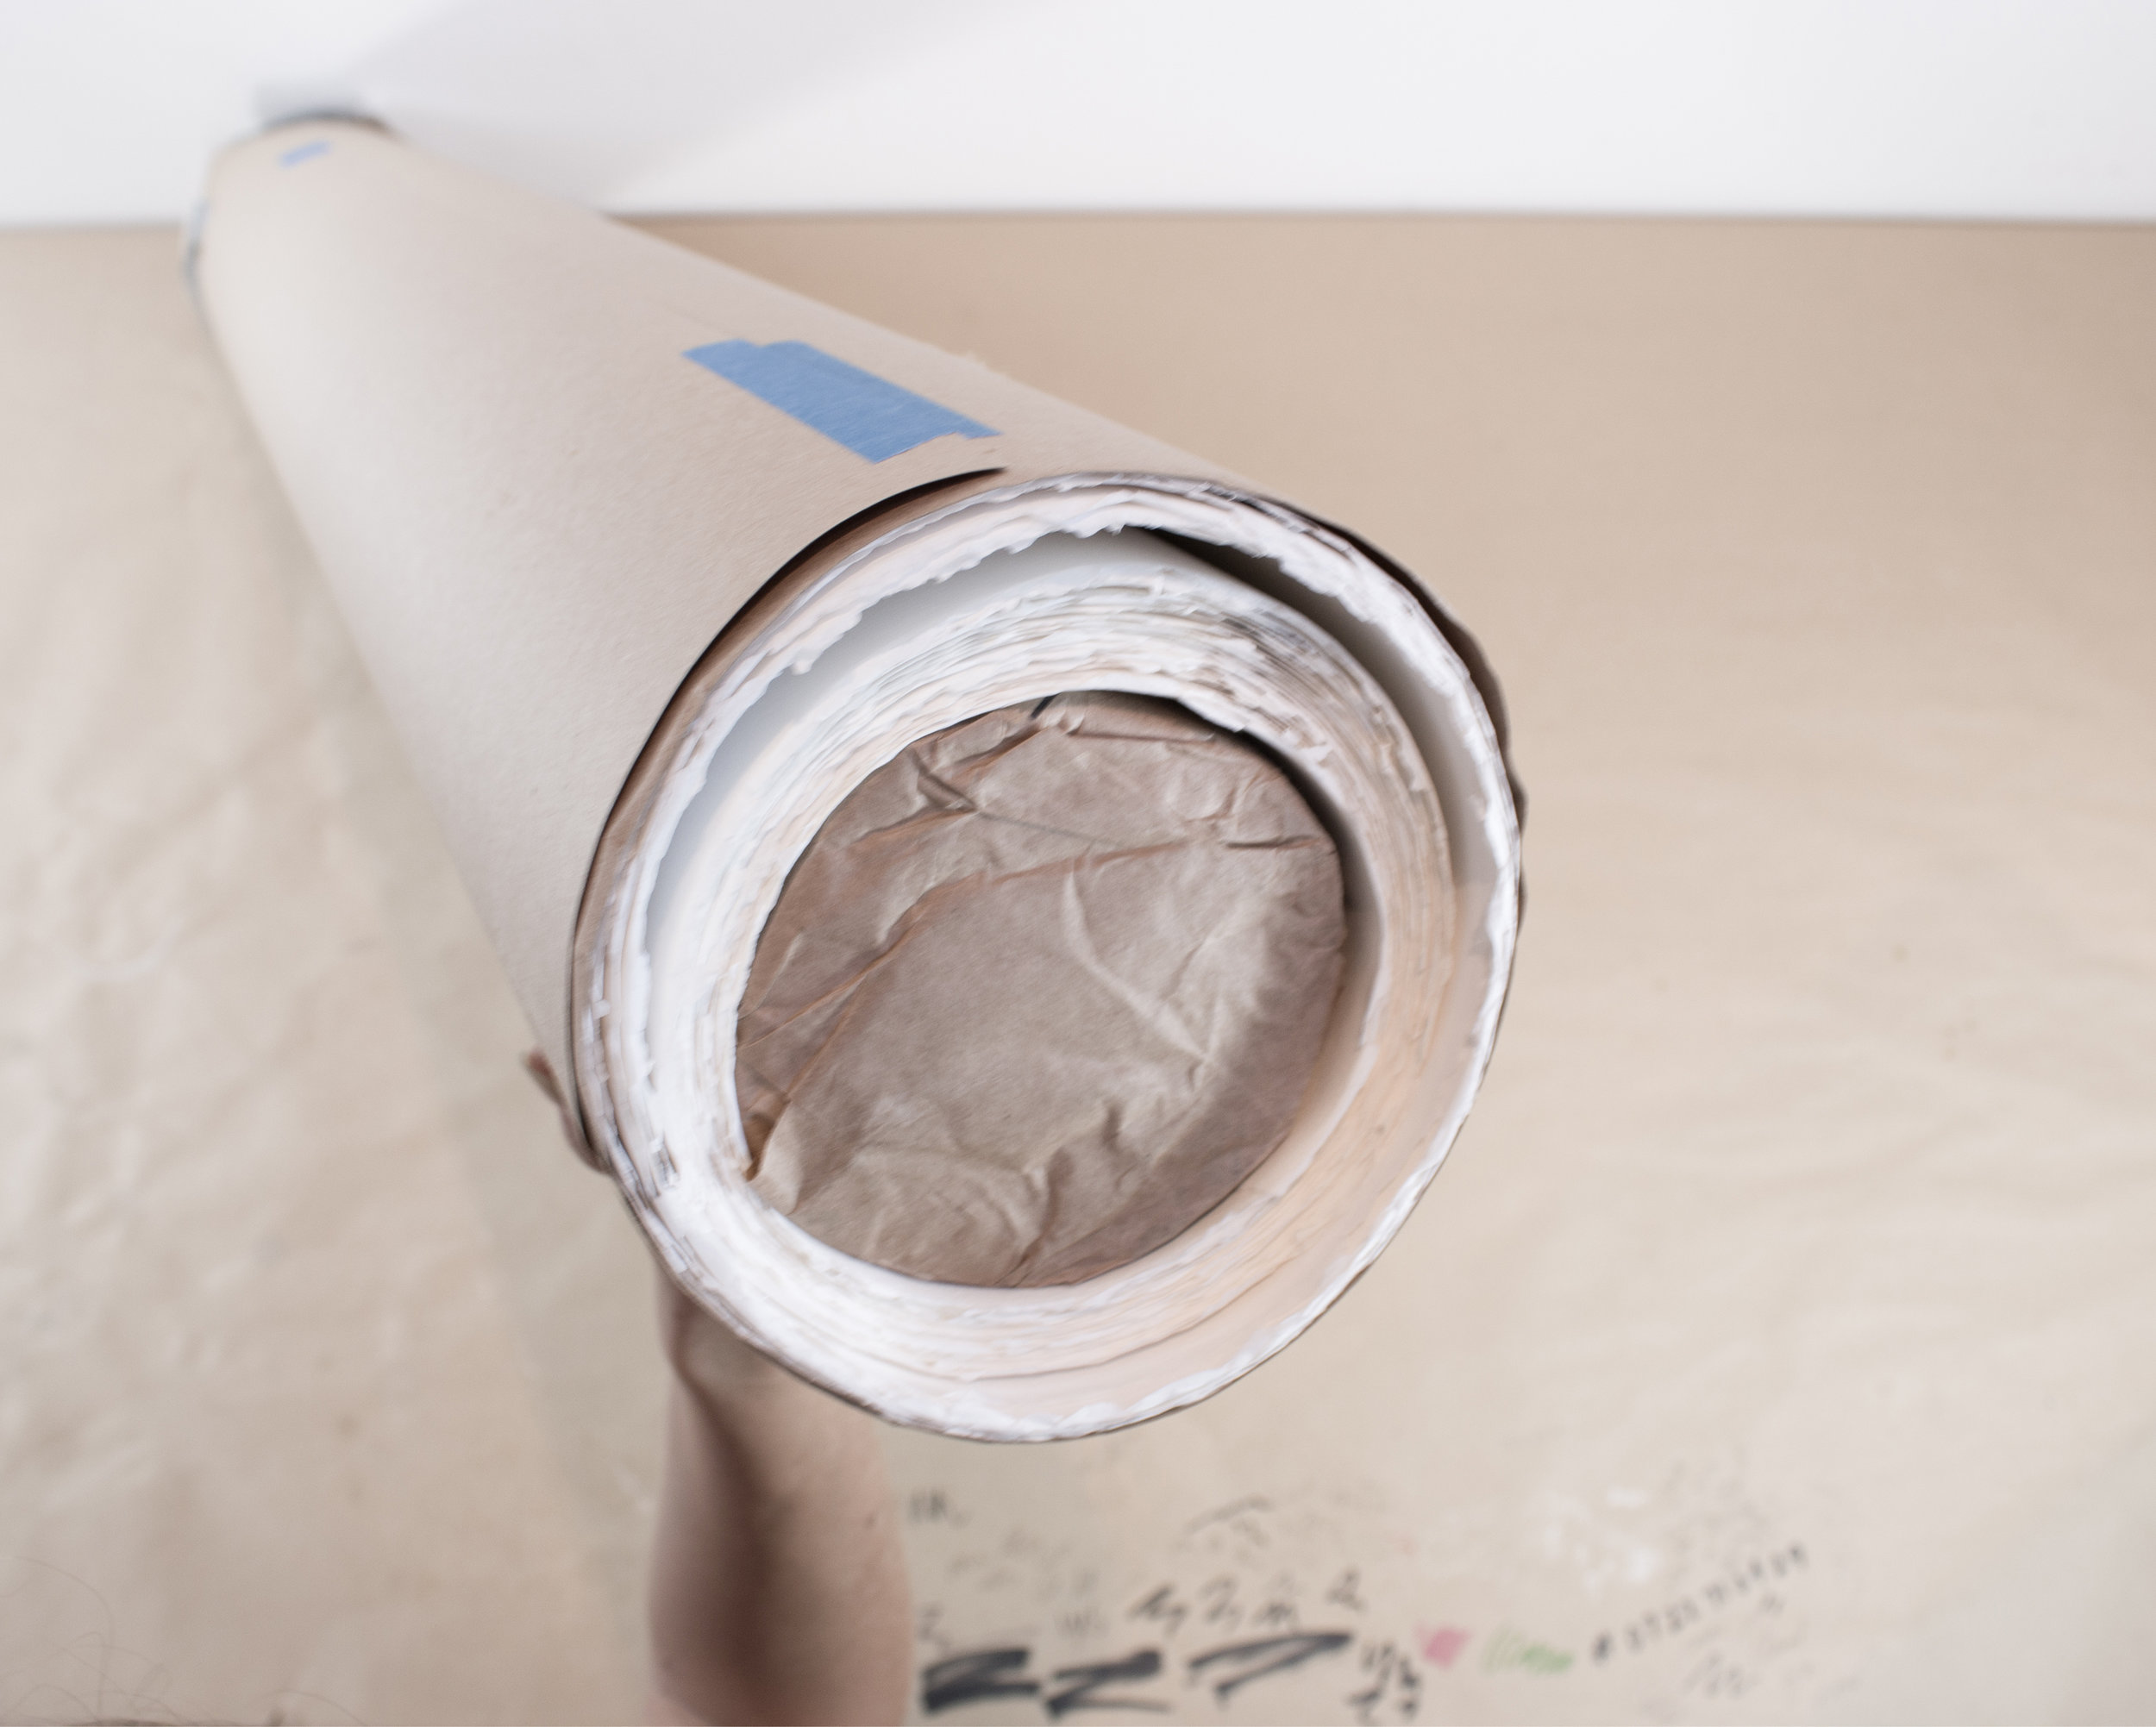
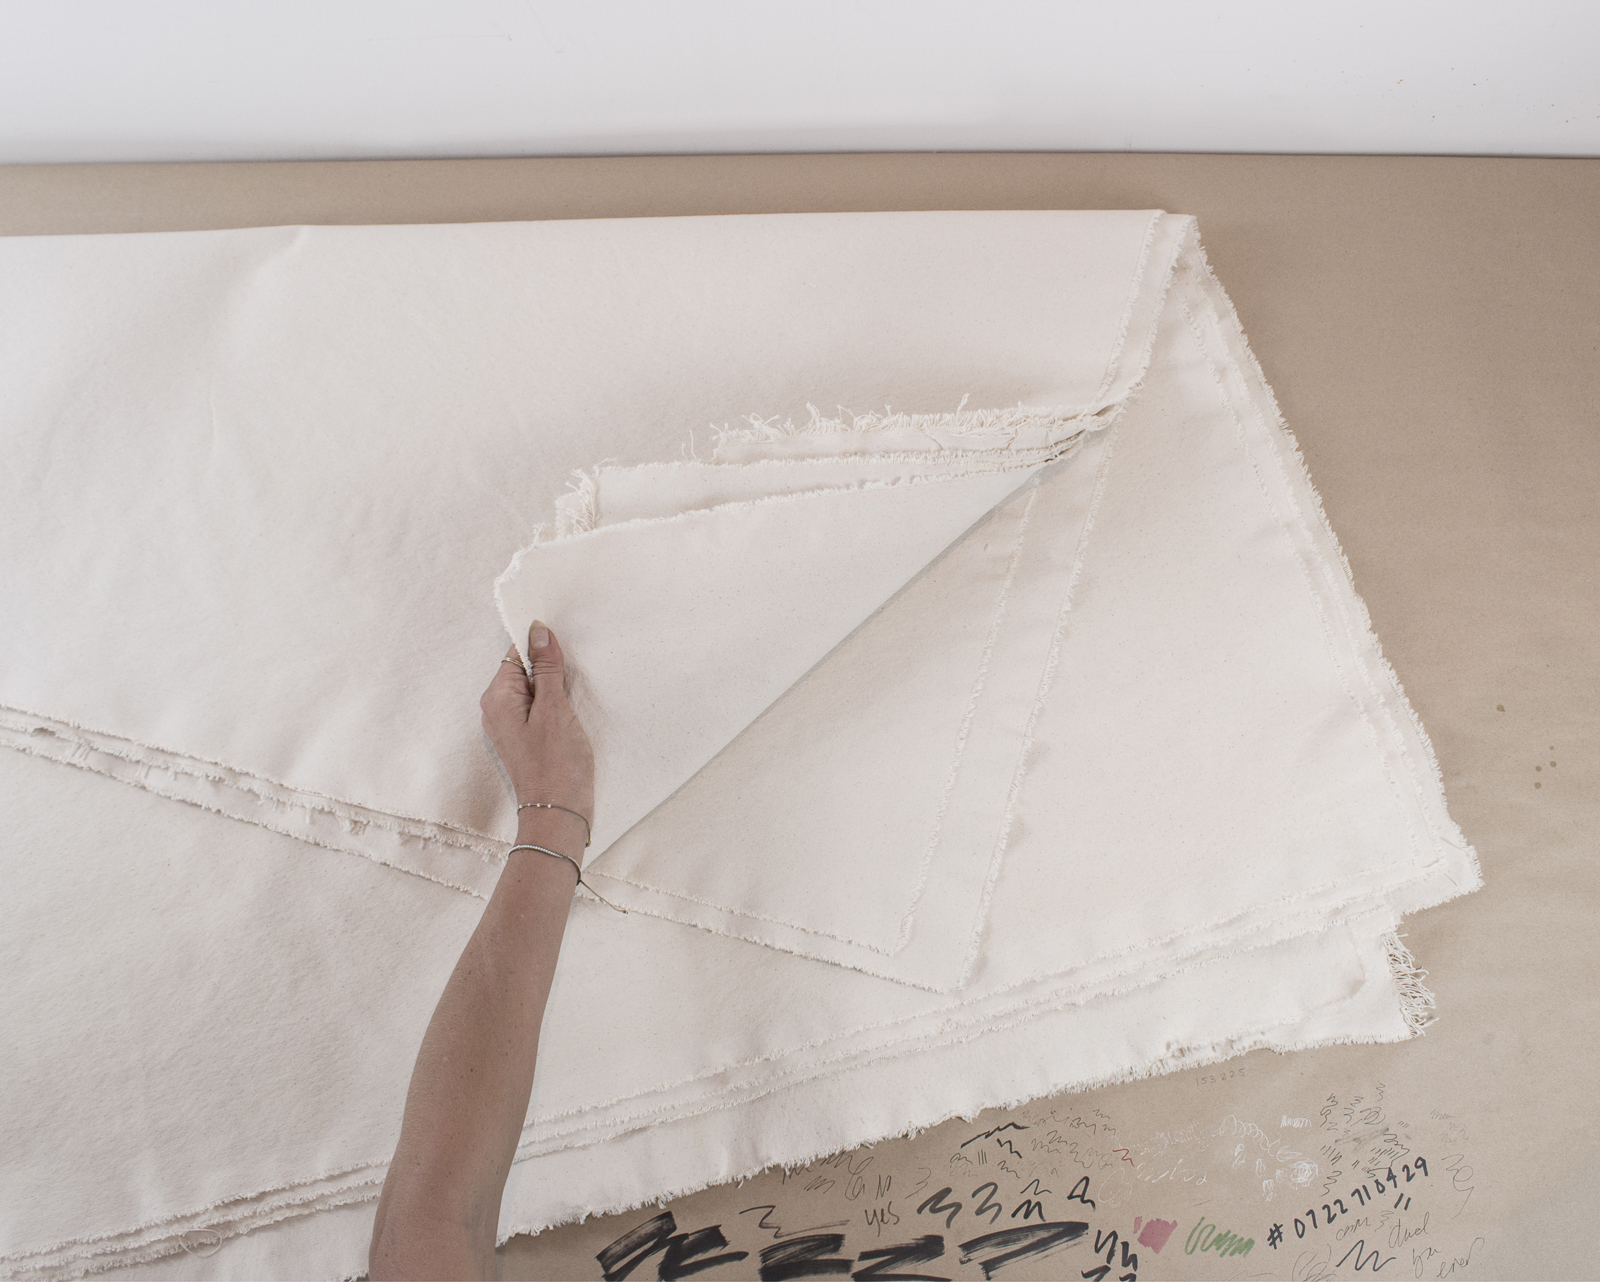
After that I wrapped raw canvas around the paper. I pre-cut pieces of canvas from a 48" roll into dimensions that I like to work in. Cutting the canvas down makes it much easier to roll the pieces around the paper - otherwise the layers tend to start to roll unevenly and eventually get bunched up, creating wrinkles that can be really hard to flatten out.

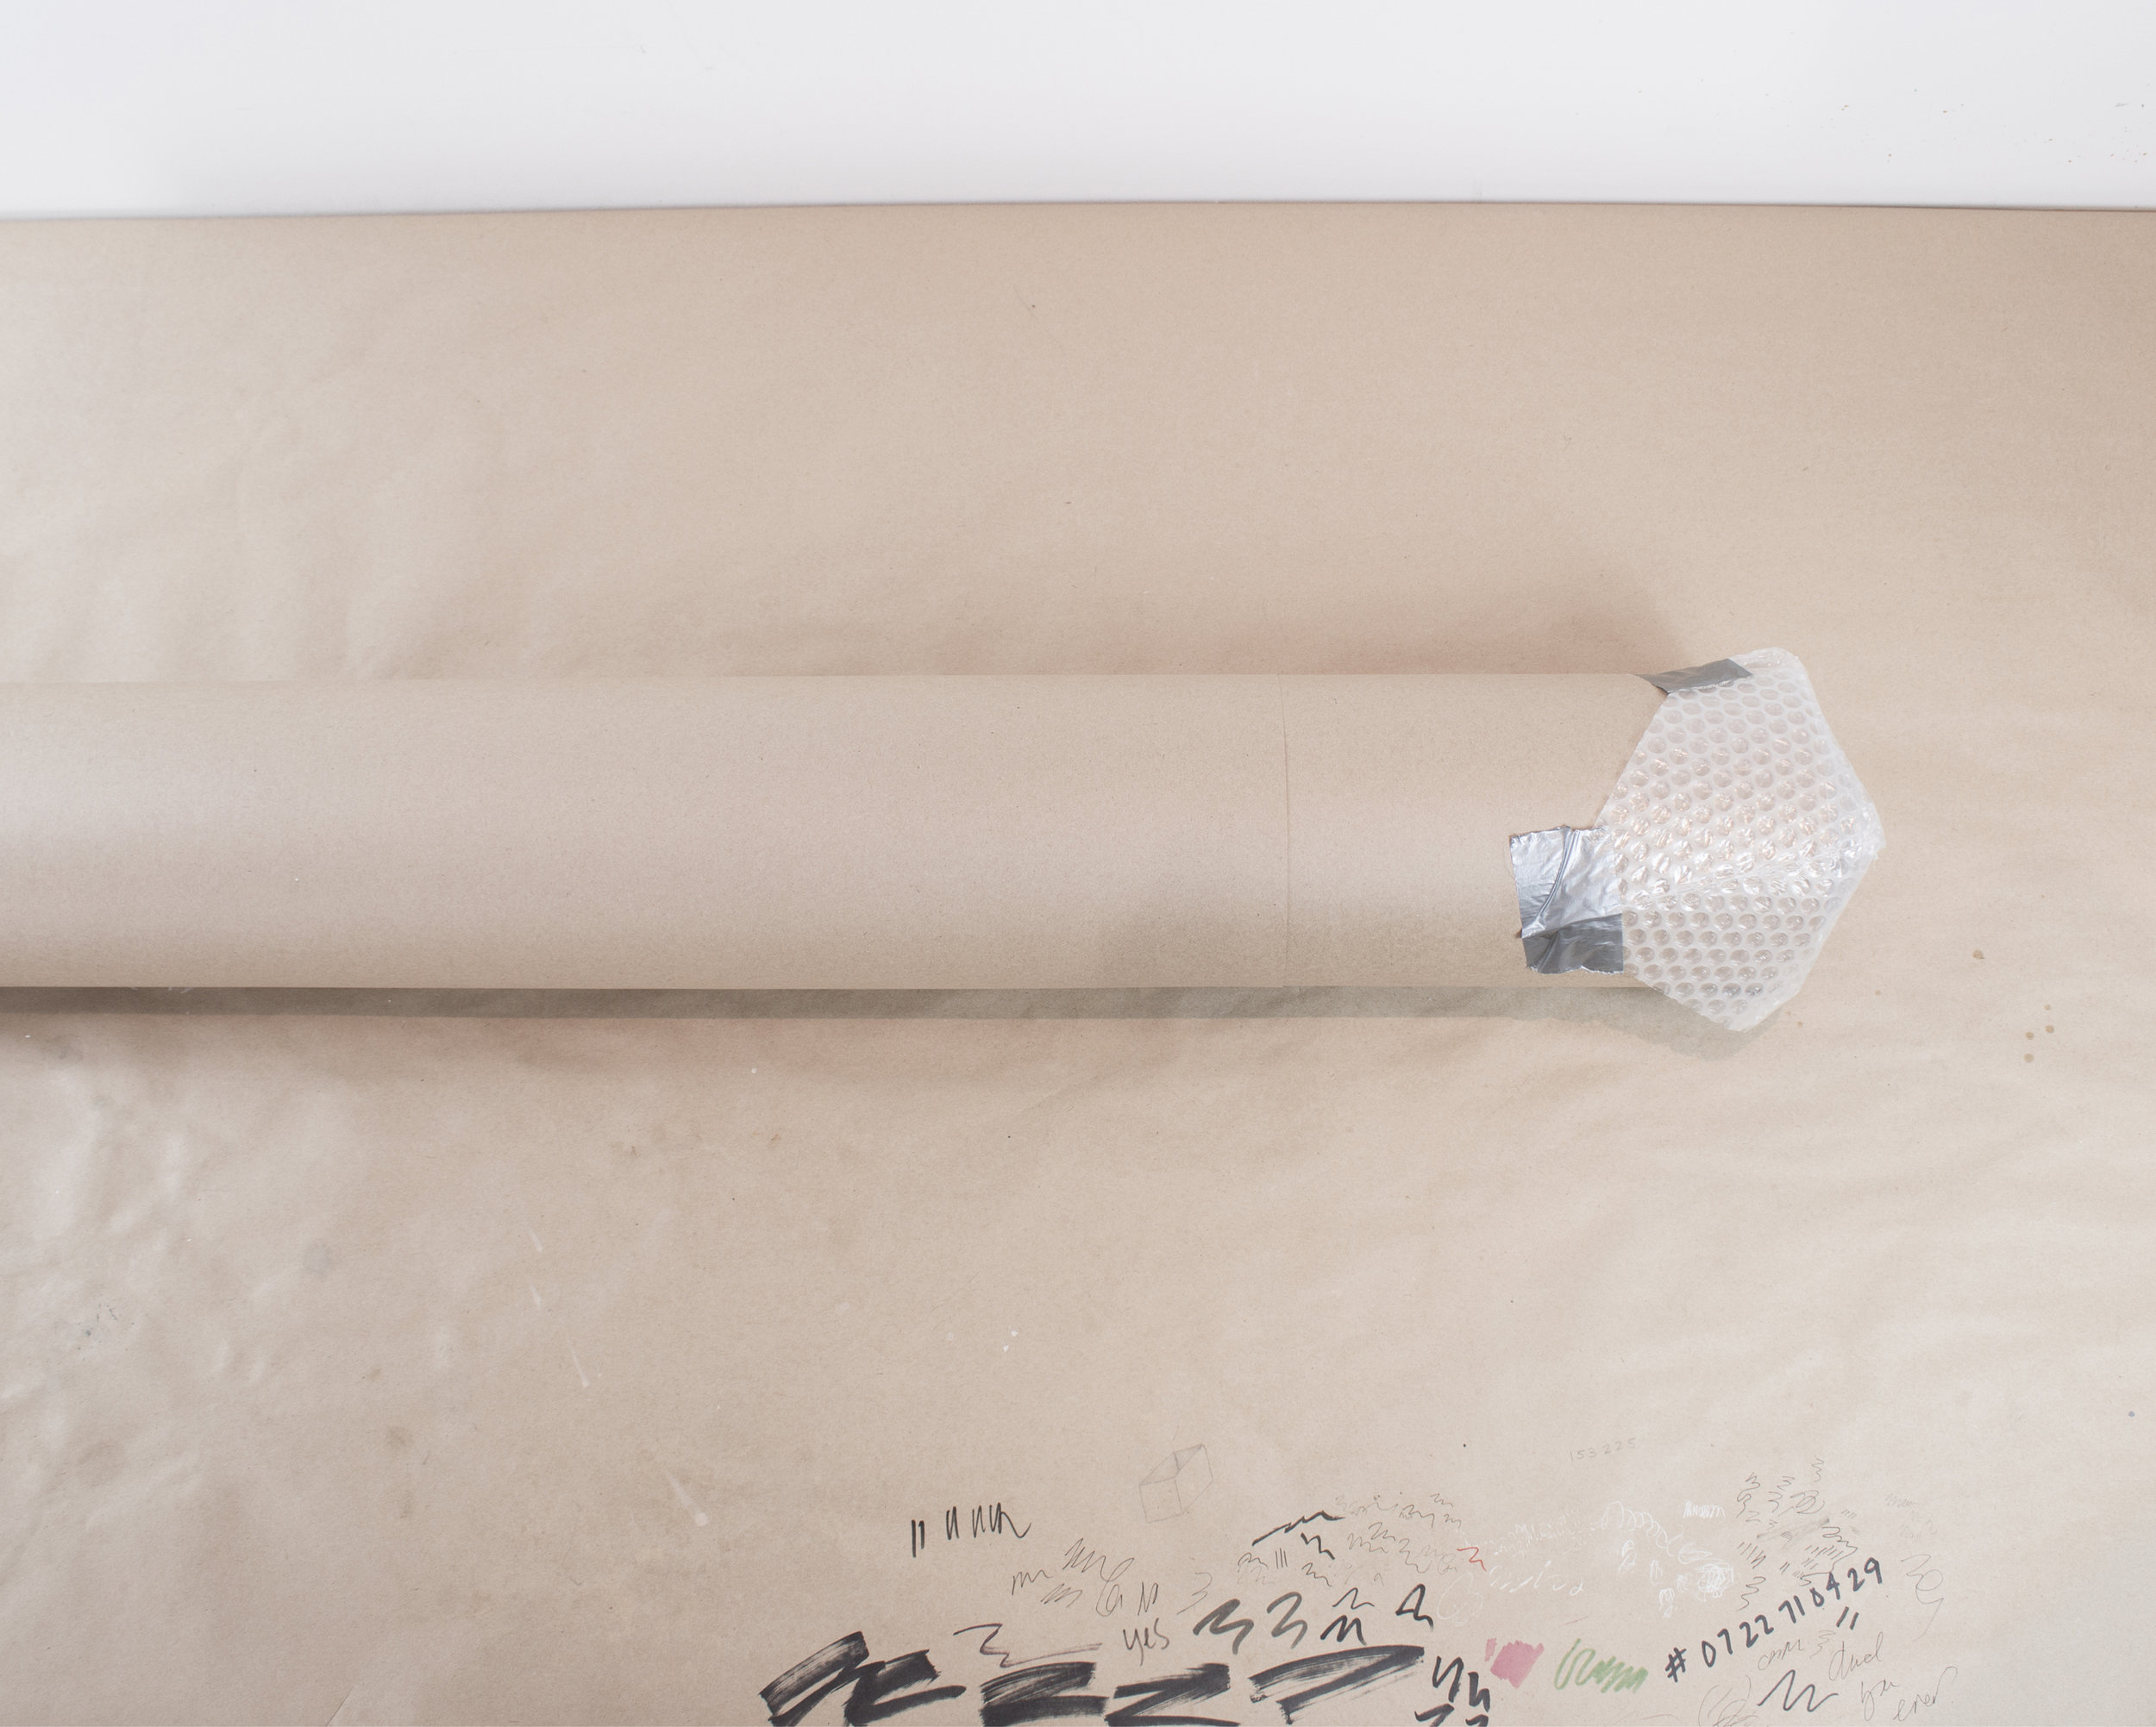
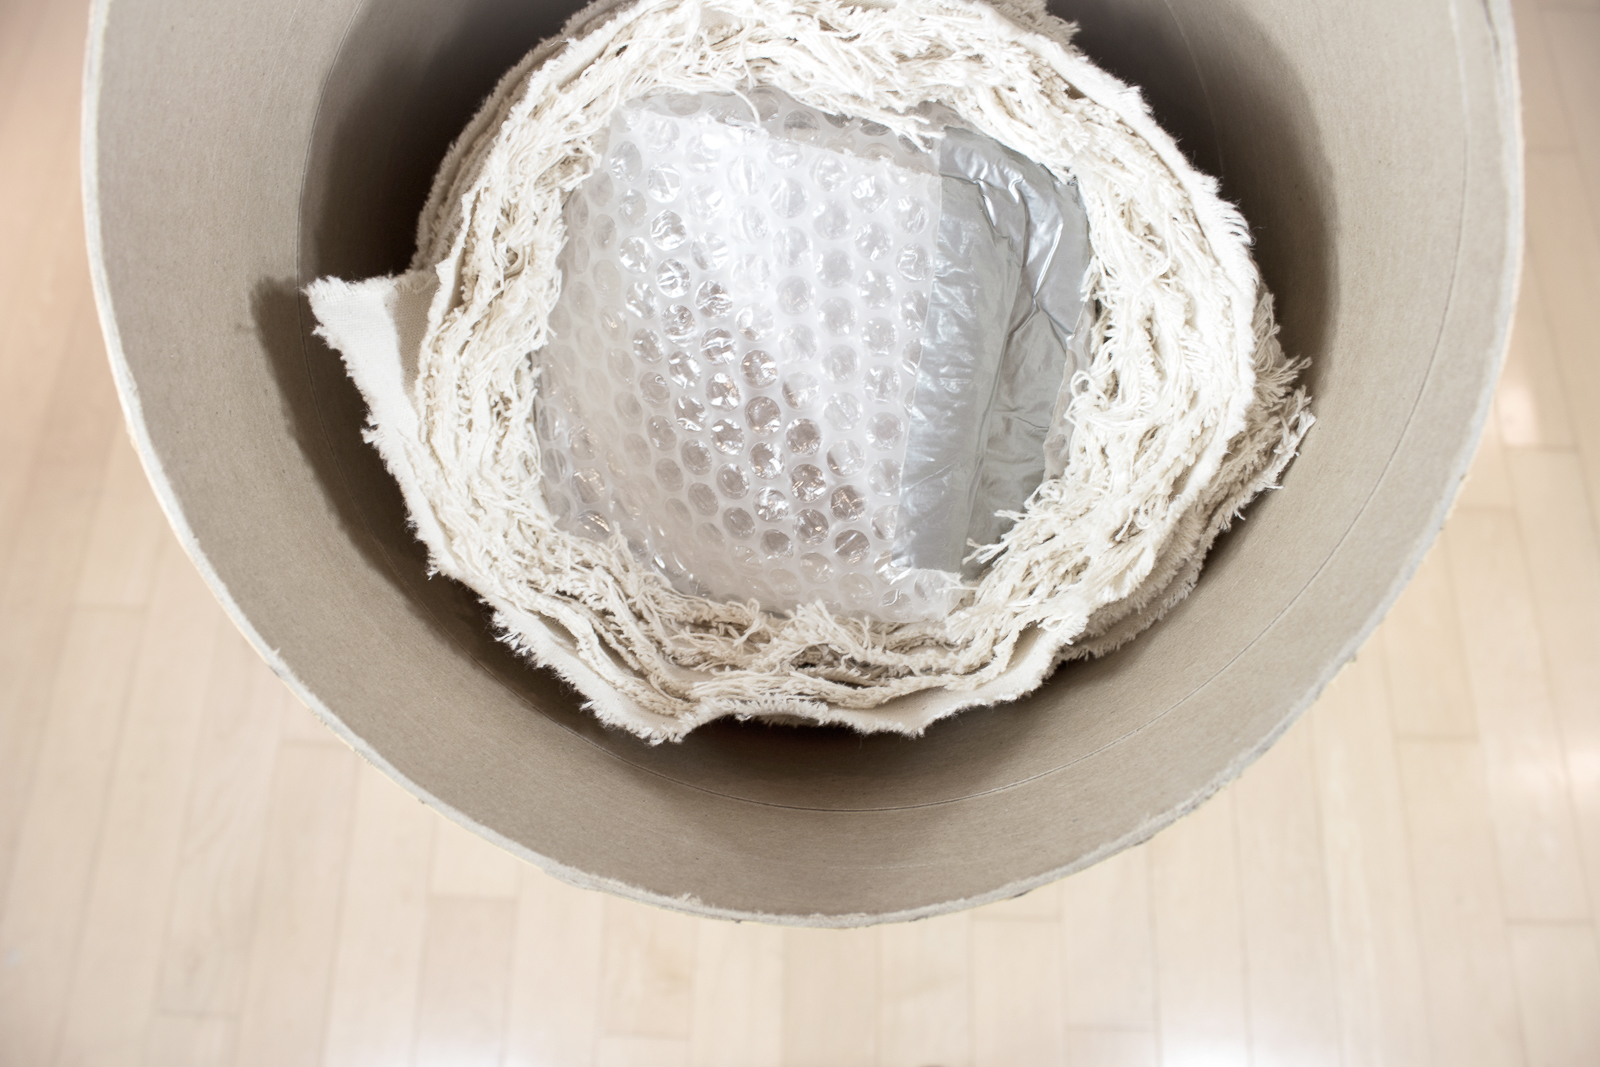
Since the ends of the roll are the only vulnerable parts of the package, I protect them with a little bit of bubble wrap.


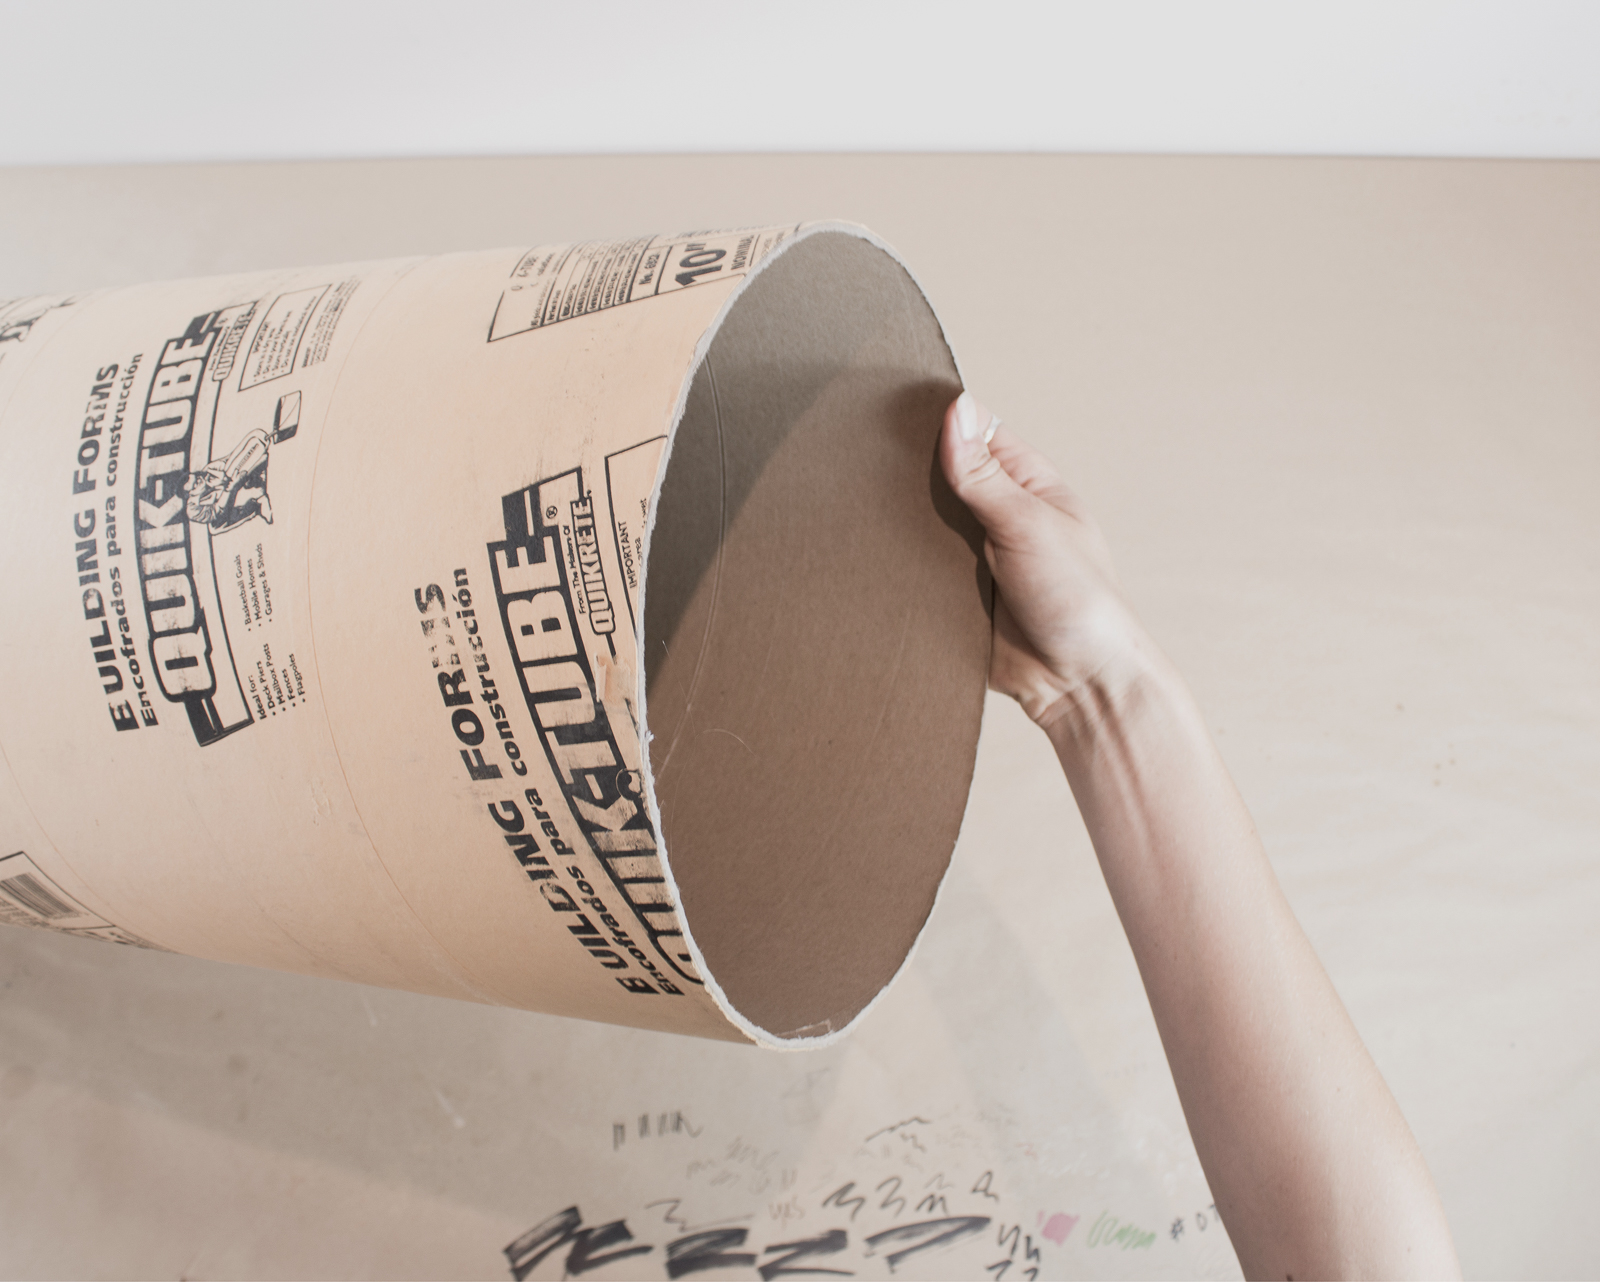
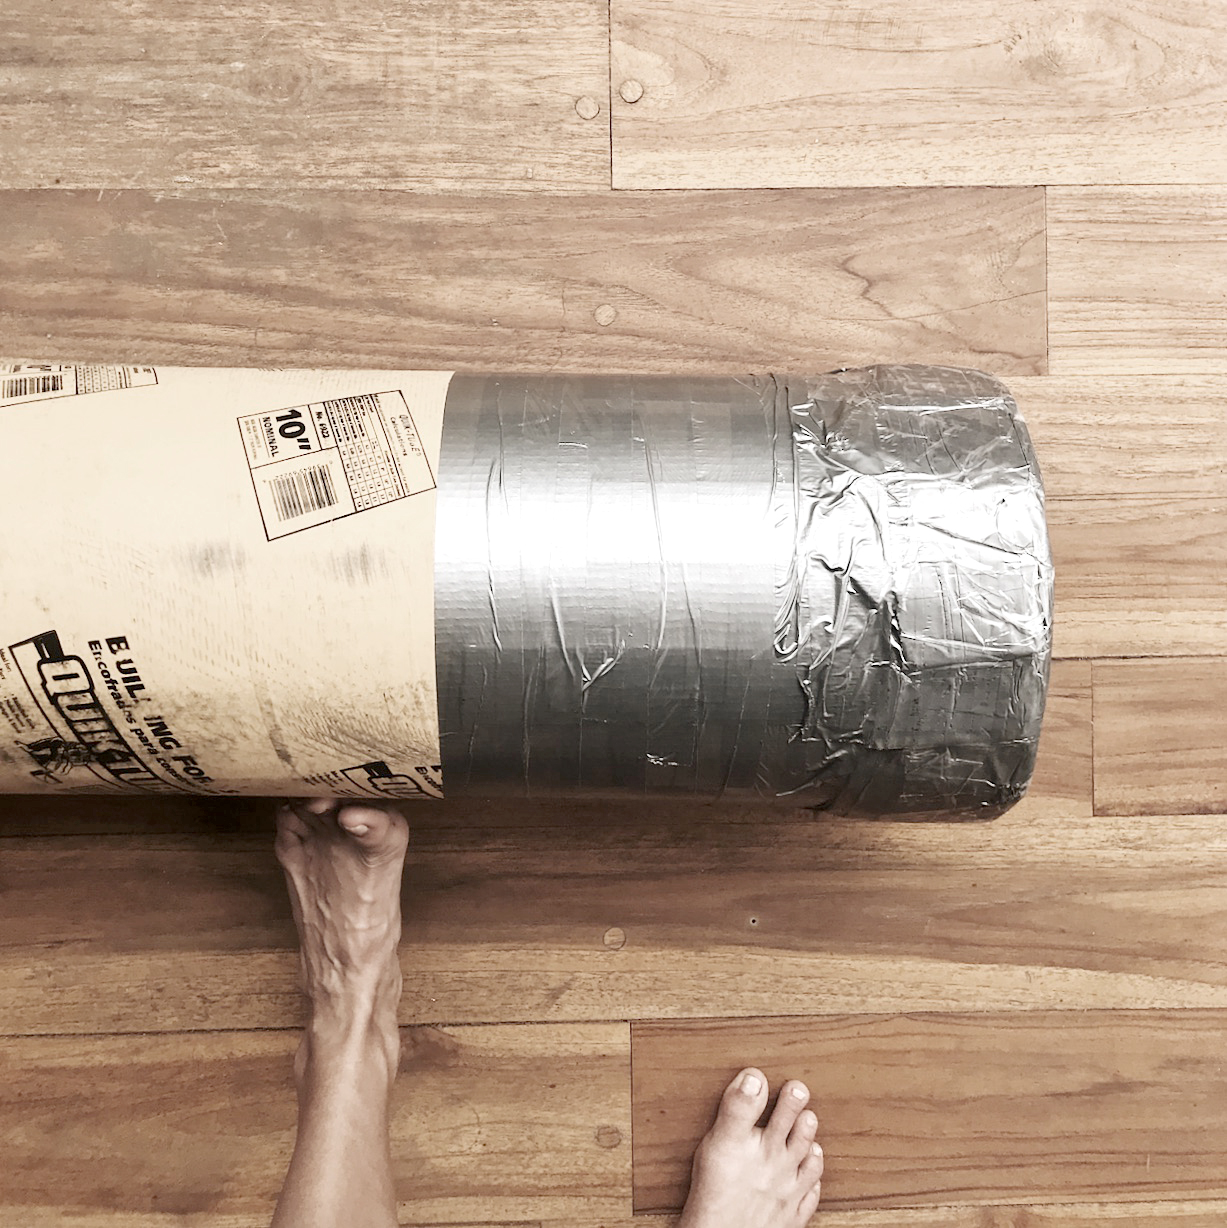
To get my paper and canvas rolls to my destination safely, I head to Home Depot for a heavy duty cardboard tube. They are made for pouring concrete columns but they make perfect oversized architecture tubes. They come in 4’ pieces in your choice of 8”, 10” or 12” diameters. Remember to factor in a little bit of empty space in your tube so there's room for your work to expand once it's been painted. Google brand names like Sonotube, Quickrete and Sakrete to find a local distributor.

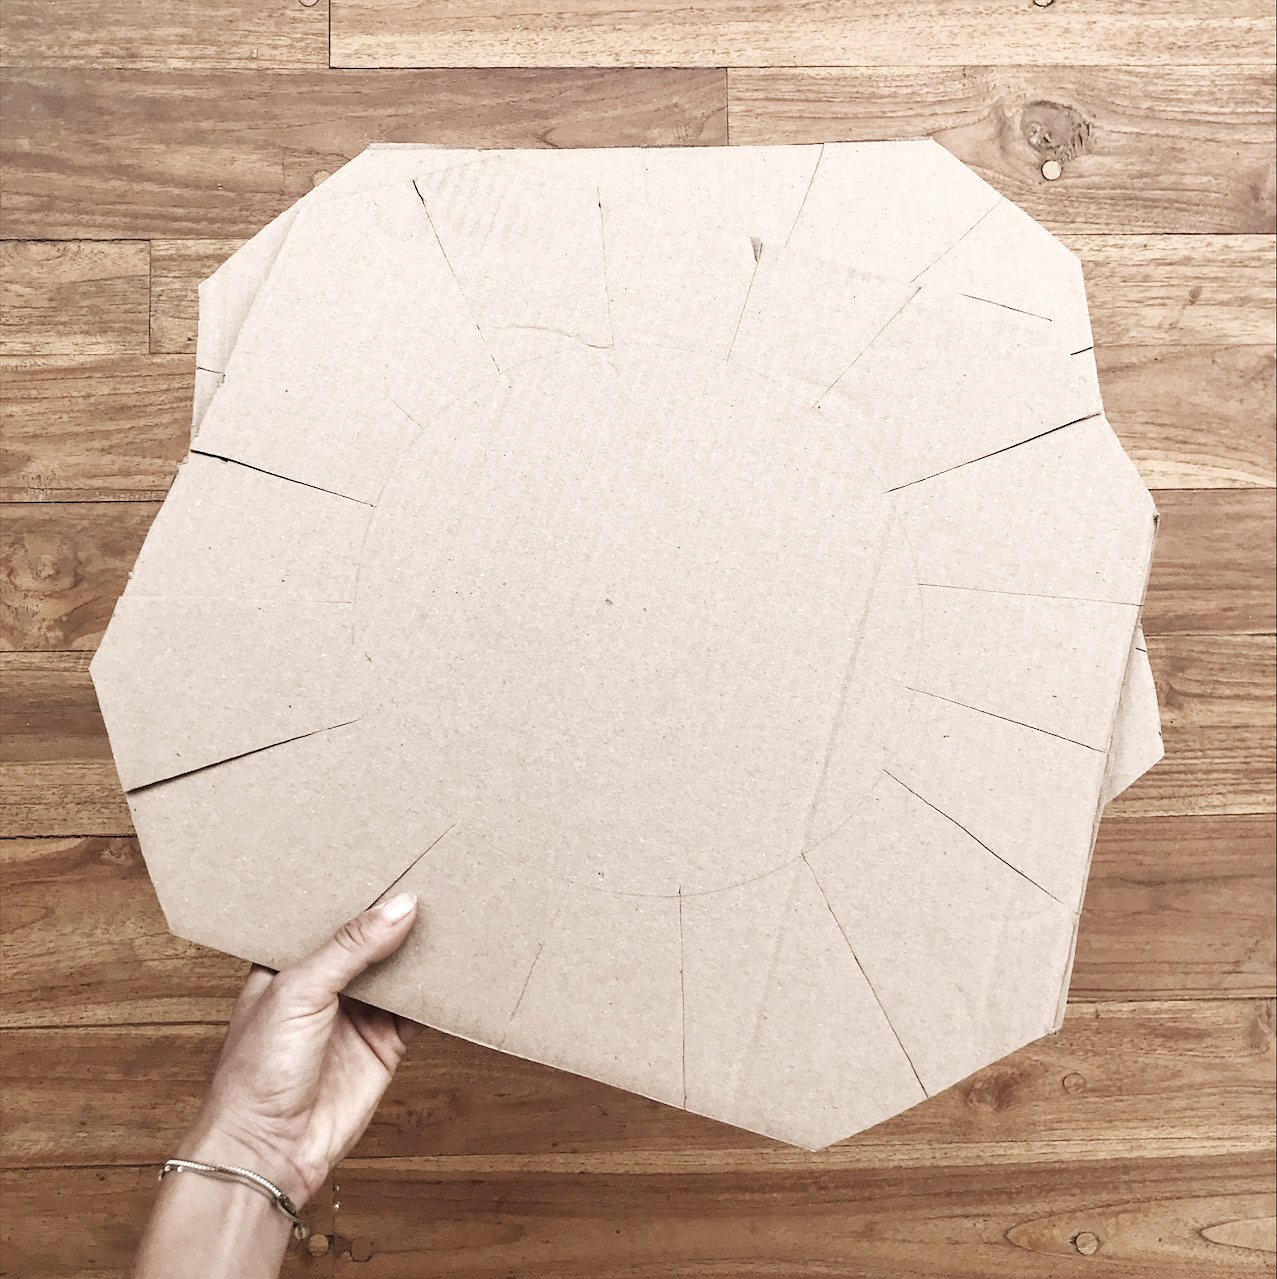
Next you'll want to make end caps for your tube. My favorite method is cardboard. I cut circles that are 4-6” larger than the diameter of your tube. To make your caps, stand your tube upright on a piece of cardboard and trace around it. Draw a second circle around the outside with a padding of 2-3 inches and cut along that line. Cut slits in the cap (from the outside in) to make tabs that fold down around the side of your tube. I go crazy with duct tape (with an initial layer of Gorilla tape hiding under it) to secure the caps to my tube, making sure that there's tape protecting all the edges of the cap where the most impact is likely to occur.
Prepare four caps, and pack the extra two in your suitcase in case you need to reinforce or replace them.
Surprises / what to be prepared for
Sometimes TSA will want to take a peek inside your tube before you check it. I tape one end properly at home, but only use a couple pieces of tape on the other end to temporarily secure it until I’m certain that I’m clear at the airport. (It’s much better to open your package yourself than risk TSA hacking into it with a box cutter and damaging your materials.) Bring a roll of tape with you so you can finish the job once you’ve been given the go ahead.
Be aware of the import taxes at your destination. These can be unpredictable, based on the discretion of whoever's working the scanner when you arrive. I’ve been lucky, and scooted through under the radar. But I’ve also been flagged and had my tube retained overnight for value assessment. Taxes can be as high as 40% depending on the country, so do a bit of research before you fly. It's good to have a copy of your receipt handy when presenting the value of your goods. When you're traveling with oversized packages like this (especially when they look admittedly suspect) it's helpful to book a flight that lands early on a weekday, just in case your goods need to be assessed by someone who works regular business hours.
If you want to avoid extra fees - look at your airline’s website to determine the maximum weights and dimensions allowed for checked bags before you’re in oversized territory. Many airlines allow bags up to 62” (combined length, width and height) before they assess an additional fee. So if you want a freebie option for your tube - you can prepare an 8” diameter piece with 2” cut off the end, making it 46" long. 8+8+46 = 62”. (Just long enough to hold a 45.5" x 10 yard roll of Arches paper.)
If you have a connecting flight, be sure to check in with all the airlines operating your trip to make sure that you're aware of everyone's checked bag fees, especially if any of your packages are oversized or overweight.

Figuring out how to work on the road has been one of the most liberating investigations of my life. My kit evolves each time I travel, and the more dialed it becomes, the greater my opportunities. Good work can happen anywhere, as long as you're prepared.